- See topic: My Info: Preference Tab
- An Employee Preference Profile must be set in the person General tab > Preference Profile field in order for employees to use preference features in this application.
Preference Profile settings that appear are configured by your organization. This means the display options and behaviors are based on configuration inputs supplied by your organization. Preference Locks can be set when configuring a Preference in the Setup area to prevent employees from editing a specific preference.
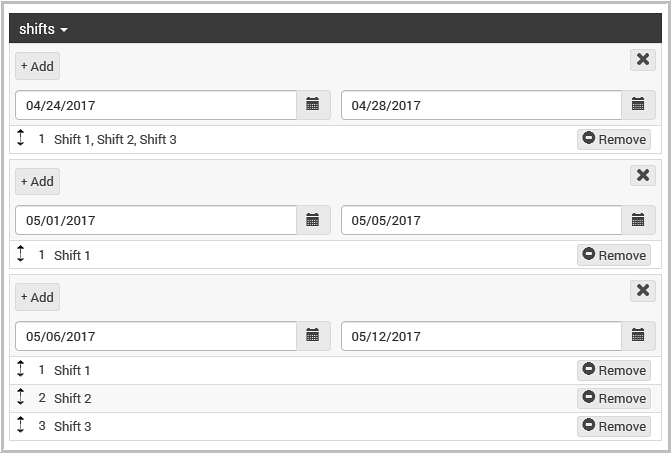
This application is designed to always return the person’s highest priority that matches the “rule”, or “job allocation”1 criteria for further processing. For example, suppose your preference choice for job X are as follows:
- #1 Choice: Shift 3 in Unit 4
- #2 Choice: Any shift in Unit 4
- #3 Choice: Any shift in any unit.
Suppose your organization has set the rule in the first preference pass to return your number one choice. If there is no X job opportunity available on “Shift 3 in Unit 4”, then the application will return zero jobs for you. Moreover, suppose the second rule pass is set to return an employee’s number one choice or greater than their number one choice. The application finds X job in Unit 4, which in this case returns the highest priority that matches the rules criteria, your #2 choice.
Simply put, the application returns the highest matching preference, your number one choice, then it evaluates your number one choice against the rule, or the job allocation criteria. For example, if the rule is set to >=2 (greater than or equal to two) and a job matches Preference one, two, and three, then this application returns the number one which is your number one choice. Since the number one is not greater than or equal to two, the criteria will fail the criteria of greater than or equal to 2 which indicates “qualify the second choice or greater”.
A single preference number will be returned from all rule or job allocation checks against preferences. The application will always return the highest matching preference number. If a vacancy matches preference number one, two, and three. The number one preference will be returned for further processing. After the number one preference is returned, the result is compared to the Where condition (or filter modifier for job allocation). If Where is set to >=2 (greater than or equal to two), the number one will fail. If Where is set to >=1 (greater than or equal to one), then the number one will pass. As you can see it is important to understand your company’s preference qualification criteria when setting your preferences so that you don’t miss out on job opportunities.
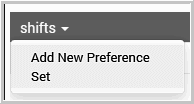
- Click the Preference Profile menu
box, and click Add New Preference Set.
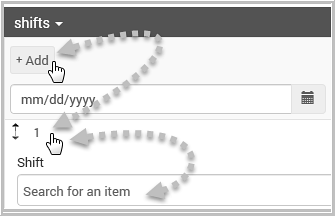
- Click +Add to open the Preference
Profile. The screen redraws based on the configuration setting for
the selected Preference Profile. The default is 1, meaning your
primary choice.